Loft Conversion in a Gable Roof: Costs, Headroom and Building Regulations
October 08, 2026 - Gable Roofs


October 04, 2026 - Design Ideas
October 02, 2026 - Roofing
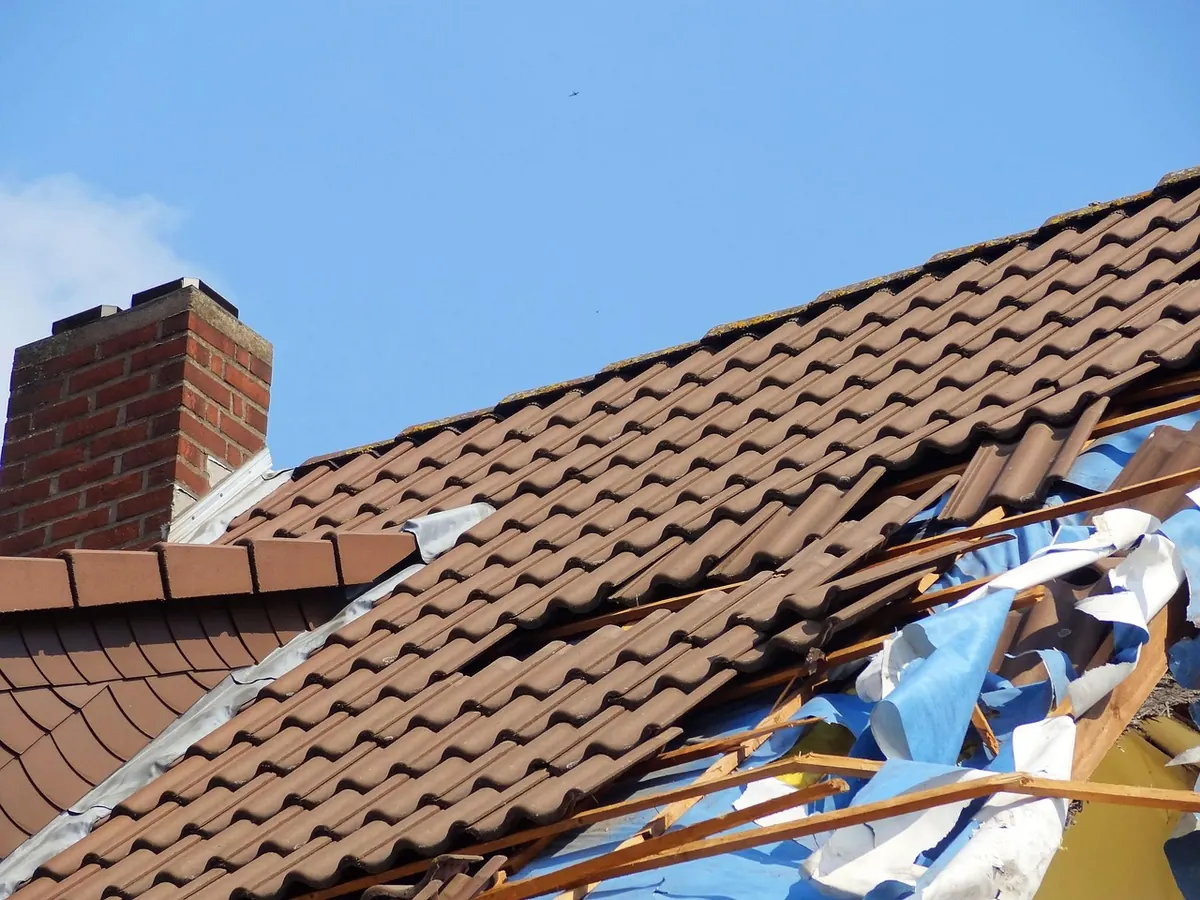
The wind drops, the rain stops, and from the kitchen window everything looks exactly as it did yesterday. Then a fortnight later a brown stain creeps across the bedroom ceiling, or a piece of mortar turns up in the gutter and you start counting ridge tiles from the driveway. Storm damage rarely announces itself. It sits there quietly, letting water in a little at a time, until the damp patch gives it away.
The good news is that most post-storm problems are visible from the ground if you know where to look. Here is a sensible order of work, starting with the safest and cheapest checks.
Do not climb onto the roof after a storm. Slates and concrete tiles are slippery when wet, battens may be weakened, and a tile that has shifted underfoot will not hold your weight. Ladders on soft ground are their own hazard. Binoculars, a phone camera with a decent zoom, and a walk across the road will tell you more than a rushed climb ever will.
Work out which way the wind was blowing during the worst of it. Damage clusters on the windward slope and around the gable end that took the brunt. Then walk the perimeter of the house and the garden, slowly. Broken tile fragments, granules of mortar and twists of lead in the flowerbed are all clues, and they tell you roughly where something has come loose.
Scan each roof slope in horizontal bands rather than trying to take it in at once. You are looking for anything that breaks the pattern.
On older properties with natural slate, a storm often finishes a job that corrosion started years earlier. The nails holding the slates rust through, the slate slips down an inch or two, and the next gust takes it. A single slipped slate is not usually an emergency, because the underlay beneath the battens will shed most of the water that gets past it. But it will not do so indefinitely, and the water it does let through tends to land on timbers and insulation rather than running neatly away.
The ridge is the highest, most exposed line on the roof, and on many UK homes the ridge tiles are bedded in mortar. That mortar hardens and shrinks over the years, and by the time a storm arrives it is often holding on by habit alone. From the ground, look for gaps in what should be a continuous ridge, tiles sitting proud of the line, or crumbs of mortar washed into the gutter below.
Verges — the edge tiles running up the gable — deserve the same attention. Mortar-bedded verges crack and fall away in sections, and dry verge systems can lose clips or end caps in high winds. Hips, where two slopes meet, are worth a look too.
One safety point matters more than any other here. A loose ridge tile or verge tile above a path, driveway or back door is a genuine hazard, and it will not improve on its own. Keep people and cars clear of the area below until it has been made safe, and treat that as the one job worth calling someone out for straight away.
Water gets into roofs where something interrupts them. Chimneys, dormers, rooflights, soil pipes, abutments against a neighbouring wall and the valleys between two slopes are all weak points, and all of them rely on metal or mortar to keep the weather out.
Look for lead flashing that has lifted, torn or been pulled away from the brickwork, leaving a visible gap. Check the mortar pointing on chimney stacks and the flaunching — the sloping mortar collar — around the pots. This pointing cracks with frost and age, and a storm can lift pieces clean off. Torn valley linings are harder to spot from below, but if you can see daylight through a valley or a dark, ragged edge where the metal should be smooth, that needs attention.
Water entering at a gable end rarely drips straight down. It runs along battens, timbers and the underside of the roof covering, and can appear several metres from the actual entry point. That is why a damp patch on an upstairs wall does not always mean a hole directly above it.
The clearest test is a loft visit with a torch, ideally on a wet and windy day or shortly after. Look for:
Inside the house, watch for paint bubbling on an upstairs wall, tide marks on wallpaper, or a ceiling stain that grows after each spell of bad weather. Photograph anything you find, with something in the frame for scale.
Before you call anyone, build a record. Take wide shots of each elevation and close-ups of any damage, note the date of the storm, and keep any receipts for emergency work. If you plan to claim, check your buildings insurance policy and speak to your insurer before authorising anything beyond making the roof watertight — most policies cover storm damage, but wear and tear, poor maintenance and gradual deterioration are usually treated differently, and it is worth understanding where you stand before work starts.
When you do instruct a roofer, ask for a written quotation that lists what will be replaced, whether scaffolding is included, and whether replacement tiles or slates will be matched to the existing roof. Be wary of anyone who turns up uninvited after a storm and asks for a large payment upfront, and remember that a proper repair in dry, calm weather is nearly always cheaper than the damage caused by waiting.
Move furniture and valuables away from any damp patch, place a bucket where it drips, and clear leaves and debris from gutters and downpipes so water is not backing up into the roof. Do not attempt temporary repairs at height yourself, whatever the videos suggest. Keep a couple of spare tiles or slates from any previous job tucked away in the shed — matching them later can be surprisingly difficult.
Finally, make the inspection a habit rather than a reaction. A ten-minute walk around the house with binoculars each spring and autumn, and a quick torch check in the loft after every named storm, will catch most problems while they are still small, dry and inexpensive to fix.
Photo: Jan-Mallander / Pixabay
A practical guide to gable loft conversions, covering headroom calculations, structural work, insulation, building...
Gable roof extensions often fall under permitted development, but height limits and local rules can trigger the need...
Copyright © 2026 Gable Lab. All Right Reserved.